So rather than said cupcakes, today I will be sharing the fruits of my creative labor.
My brain and I need to have words.
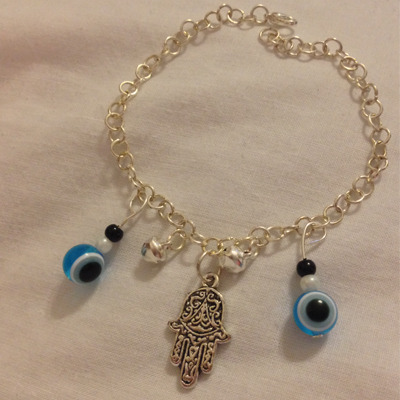
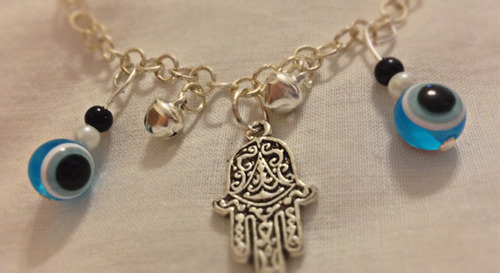
In case anyone is wondering, the Hamsa is an amulet or talisman that is used as a symbol for protection; more commonly protection against the Evil Eye. It is also known as the Hand of Miriam or the Hand of Fatima.
As I was finished the chain to make the bracelet, I decided to use two silver bell charms – bells have long been used to clear the energy of an area and to purify it which I thought tied in nicely with the Hamsa and the blue eye beads; which are also used as protection against the Evil Eye.
To make this bracelet I used the following:-
Silver jump rings (enough to make a chain that will fit your wrist, I used a couple of extra rings so it fit a little loosely)
One silver lobster clasp
Two silver headpins
One antique silver Hamsa charm
Two blue Evil Eye beads
Two white glass pearl beads (4mm)
Two black glass pearl beads (4mm)
Two silver bell charms
I also used a small pair of needle nose pliers to help open and close the jump rings and bend the headpins.
So, first of all you’ll need to put the bracelet together. This is pretty easy to do – just open a jump ring, slide the open ring into another one and then close it. Repeat until you have this:

Once you have the right length for your wrist, add on the lobster clasp and close the jump ring you’ve attached it securely.
Now, grab another jump ring, open it and thread it through the loop at the top of the Hamsa charm, like so:

And then secure it to the chain by slotting the jump ring into one of the rings on the bracelet. I opted to put mine as close to the middle as possible but that’s because I’m a bit of a sucker for symmetry…

Take two more jump rings and thread them through the loops on the silver bells; then add them onto the bracelet:

To fix the beads to the bracelet, take a headpin and thread the beads onto it, like so:

Using the pliers, gently start bending the headpin at the top to create a loop:

And then thread the loop you’ve made into the bracelet and then bend it in on itself so it closes securely and repeat for the other side.
And there you have it – a finished handmade Hamsa charm bracelet!
Vesta xox
Very original! <3 I also love how you've explained your work step by step with photos ^^
ReplyDeleteContinue your great work :D
Hummm it makes me want to start crafting something myself lol
xx